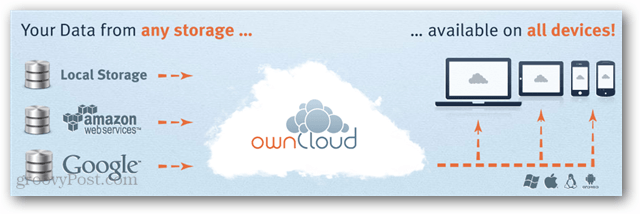
Why use Owncloud? We’re big fans of Dropbox and Sugarsync here at groovyPost, but I think Owncloud is a better solution, if you have either the know-how or bravery to set it up (it isn’t that hard…). The problem is that everything you upload to your Dropbox account is on third party servers, and Dropbox employees can not only access it, they can retrieve those files if requested to (primarily by law enforcement agencies and legal warrants). With Owncloud you own the data, and all control over it. Of course if you’re going to use it to store sensitive data you may want to use Truecrypt to secure the important files that you upload. If you want to try out Owncloud before installing it, check out the live demo site that the dev team set up for that latest version.
What you’ll need to setup Owncloud:
A Linux server/desktop. This can be one at your house, or a hosting plan (like Dreamhost or 1and1). I recommend using a host. Owncloud has a few basic dependencies such as PHP5 and My SQLite. Full server requirements can be found here. Most shared-hosting plans have all of the needed packages installed.An FTP client. I recommend Filezilla. (Not needed if installing to your own PC)(Optional/Faster) An SSH client. I recommend PuTTY.
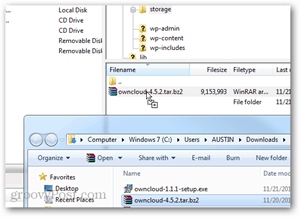
Download Owncloud from the official site: http://owncloud.org/support/install/ The latest version as of writing this tutorial is version 4.5.2, and I recommend grabbing the latest version if there is a newer one available (higher number means newer). We’ll split this into two different types of guides, a short one with the basics, and a longer one with more details.
The short setup guide:
The detailed setup guide:
First off you need the latest version of Owncloud. Updating can be a bit of a pain, so I highly recommend getting the latest version unless it doesn’t work with your server for some reason. For home use, first try the auto web installer before tackling the manual method. Note that the web installer doesn’t usually work with remote hosting.
Next upload the the Owncloud files to your server. These need to be placed in an outward facing folder that you can access from the internet (/var/www/). On shared hosting this will likely be a subdirectory underneath your main domain installation folder. The easiest way to upload the file on a remote server is with FTP. Note that if you don’t have SSH access you’ll need to extract the archive and then upload the contents, not the archive itself. The big advantage to using SSH here is that it gets the files extracted on your server exponentially faster, but the end result is the same.
(SSH Only) Use PuTTY to SSH into your server (or root console if a local PC) Within the PuTTY command line browse to the directory that you uploaded the archive to, and then run the following command to extract it: As mentioned above, if you don’t have SSH access you’ll need to first extract the tar.bz2 file and then upload the contents. This will take a lot longer than extracting it after uploading, but it gets the job done.
Now you just need to change the permissions of the install. If you are still connected via SSH just run the following command from the parent directory that you uploaded owncloud into. Just replace www-data:www-data with your username and group on the server, but many Apache servers use www-data as the username. If you don’t have SSH the alternative is to browse to the config file via FTP and set the permissions to 777 (All access all users). Once the installation is done you can set this back to 750 to re-secure it.
That’s all there is for backend config. Next, visit the owncloud directory using your browser. Create your administrator account, give it a good password, and finish setup. If My SQLite is detected it will automatically be used, if not you may need to set up an MYSQL database which can be configured while creating the administrator account.
Once you have your admin account setup I recommend creating a secondary account and using it for syncing with all your devices. This is just an extra measure of security to prevent someone from gaining access to your Owncloud by using information stored on one of your synced devices. I highly recommend using the desktop syncing client as it provides a seamless backup experience. It can be found for all operating systems on the Sync Client Download page. If you have a mobile device Owncloud is also available on Android and iOS ($0.99 on iTunes).
When connecting a syncing client, use the same address that owncloud is installed into. If you have SSL enabled on the server you can “use a secure connection.” Otherwise just enter your account username and password and everything should work!
That’s all there is to set up and getting started with ownCloud. If you have any questions regarding this groovy service, please drop a comment below.
Troubleshooting
If you see: This is caused by your server not utilizing the latest version of PHP. You may need to update PHP on the server. Some web hosts have the latest PHP installed, but it is not used by default. In that case, the solution is to add the following two lines to your .htaccess file (this is the case with 1and1): If you see: This likely means your server isn’t configured to use SSL. Usually, this is because you need an SSL certificate installed on the server (more configuration information here). Unfortunately, these can be pricey and cost an average of $50 per year. However, some hosting providers offer a unique or “shared” SSL for free. These are less secure but are better than nothing. Another option is to use a free SSL proxy. If you are running owncloud on a local PC there is also this option. You can always just use Owncloud without SSL encryption, but if it is available you should definitely take advantage of the added security.
If you see: This is caused by an error in the remote.php file. Just change that file to the following code to fix it: Comment Name * Email *
Δ Save my name and email and send me emails as new comments are made to this post.


![]()
