However, if you have problems loading a site or pinging an online service via its domain name, you might need to flush the DNS cache on Windows 11. If a site doesn’t load or an app isn’t connecting, there could be too much IP address translation data. If you need to flush the local DNS cache on your system, this guide will show you how to do it.
Why Should You Flush DNS Cache on Windows?
The idea of flushing the local DNS cache is similar to deleting browser history, which solves many site loading problems. Over time, the Windows networking stack saves a copy of each domain name to IP translation to help speed up the experience. But, like browsing history, the local resolver cache can become too large or corrupt. This will prevent internet-required apps and websites from working correctly. So when you flush the cache records, you get a clean start with a new database. There are a couple of ways to flush the DNS cache. One option is via the command line, and the other is doing it from a web browser. Note: This article focuses on Windows 11, but the command line and browser options will also work on Windows 10.
How to Flush DNS Cache on Windows 11 Using PowerShell
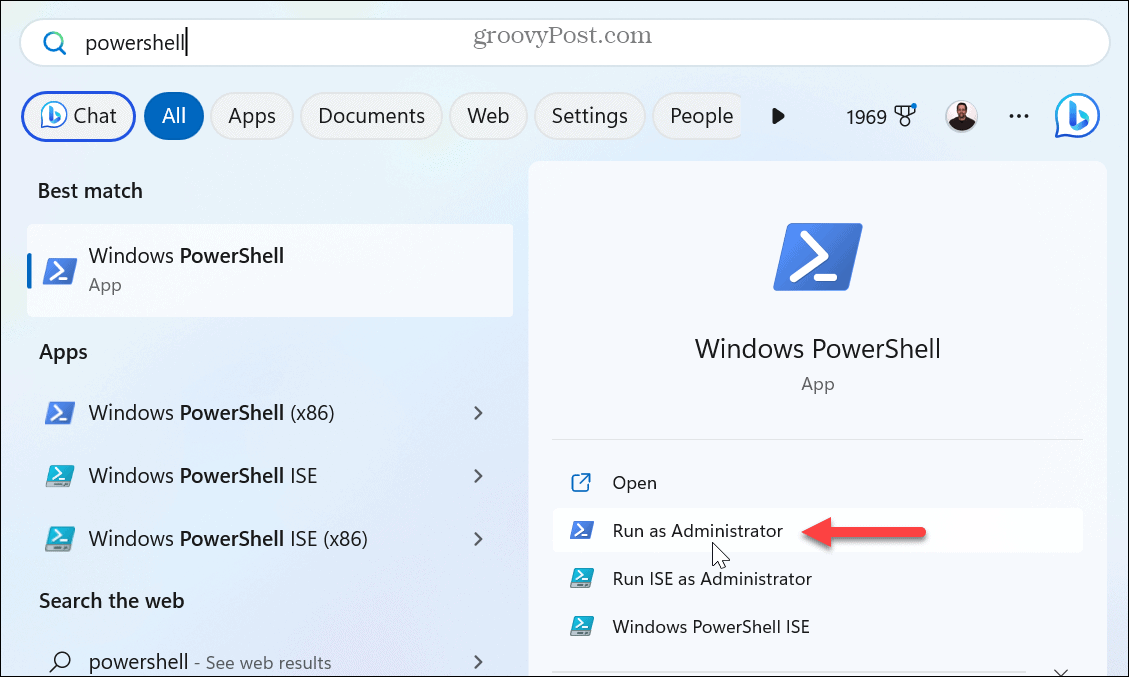
If you need to flush the DNS cache on Windows 11, one straightforward method is running a couple of commands from the command line. For reference, these steps will work in the newer Windows Terminal application, as well as Windows PowerShell and the older Command Line (cmd) utility. We’ll explain how to use Windows PowerShell below, but the steps will work in Windows Terminal or cmd, too. To flush DNS using PowerShell on Windows 11: When complete, the prompt will display under the command. It won’t display a verification message or progress bar to indicate the process is complete. Close out of PowerShell and see if you can access the website or if the problematic app works.
How to Flush DNS on Windows 11 Using Run
Another way you can flush DNS on Windows 11 is to use the Run dialog box, which executes the command without launching the terminal first. To flush DNS using Run: The DNS flush will be executed, and note that you may briefly see the command prompt while the action completes.
How to Flush DNS Cache from a Web Browser
In addition to using the command line to clear the DNS cache, you can also do it from one of the big three browsers. For example, you can use Chromium-based browsers like Edge or Chrome and Firefox (using different commands). To flush DNS from Chrome or Edge: Nothing will happen when you click the button to clear the cache from either browser, i.e., no progress bar or verification. Clicking the button has the same effect as clearing the DNS cache from the command line. Once complete, the websites and other services should start working correctly again.
Fixing Internet Issues on Windows 11
If you have problems getting to a site or an app isn’t reaching its destination, flushing the DNS cache using one of the above steps should get things working. However, since the local DNS resolver cache can become outdated or corrupt, starting fresh will get you back in business. If you can’t access PowerShell, check out how to fix PowerShell not launching. Or, if Windows is unstable and not working right, check out how to fix Windows 11 when it keeps crashing. Also, Windows Update provides bug fixes, security, and feature sets. However, it’s not without problems. So, check out how to fix Windows 11 after updates. And if you are a gamer, you might want to read about fixing game lag on Windows 11. Comment Name * Email *
Δ Save my name and email and send me emails as new comments are made to this post.


![]()
