Disable the Touchscreen on Devices Running Windows 10
To disable the touchscreen on your device, you’ll need to go into the old-school Control Panel. The easiest way to get there is to hit the Windows key and type: devmgr.msc and hit Enter. Or, choose the Best match result at the top of the search list.
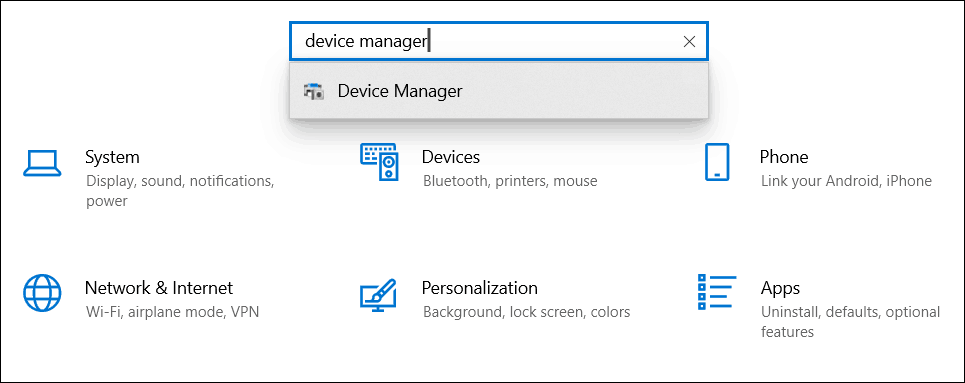
It’s also worth noting that you can open Device Manager by typing it into the search field in the Settings app, and it will open right up.
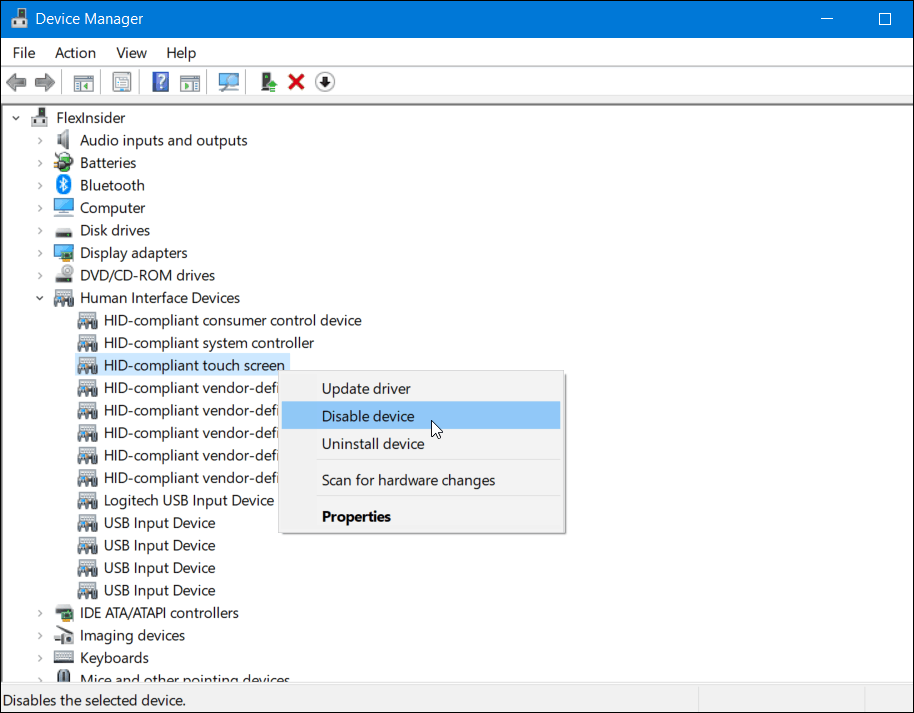
Once you have Device Manager open, scroll down and expand the “Human Interface Devices” menu. Then scroll down and right-click on HID-Compliant touch screen and select Disable device from the menu.
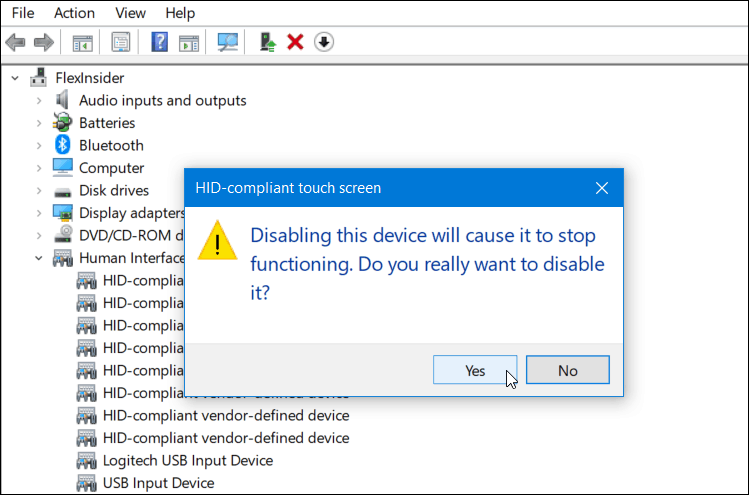
After that, you’ll need to verify you want to turn the feature off by clicking Yes in the dialog box that pops up.
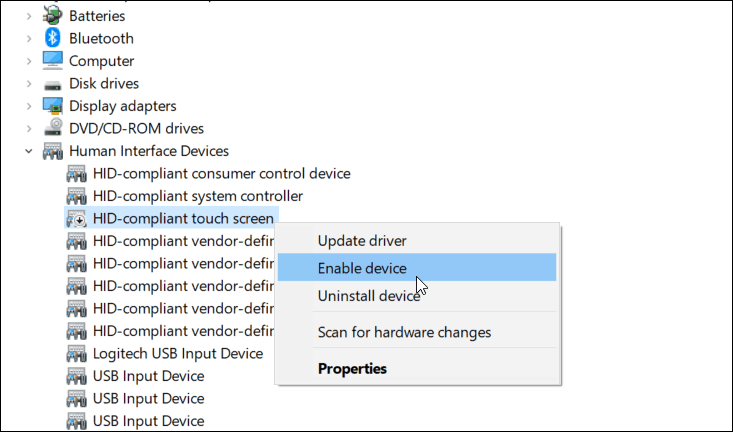
That’s all there is to it. You don’t need to log out or reboot your machine. Your touch screen should now be disabled. Test it out by tapping on the display. Now, if you decide later that you want to turn it back on, you can. Just head back to the same menu in Device Manager and right-click on HID-Compliant touch screen and this time, choose Enable from the menu.
Again, no need to log off or reboot your system. Your touch-enabled display should now be functioning again.
Summing Up
This is helpful whether you never use the touch feature on your device’s display or you are trying to troubleshoot an unresponsive touch screen. However, this isn’t the most convenient way to disable touch. I would like to see Microsoft add a switch you could toggle on or off in the Settings app. For example, you can use a keyboard combo on how to enable or disable a Chromecast’s touchscreen. Also, if you are troubleshooting your touch-enabled display, you might want to check out our article on how to calibrate a Windows 10 touch device.
![]()


