Deleting these old iPhone back-ups .ipsw files is a breeze in Windows and OS X. First I’ll show ya how to do it for Windows then I’ll review the steps for Mac OS X.
Windows Users
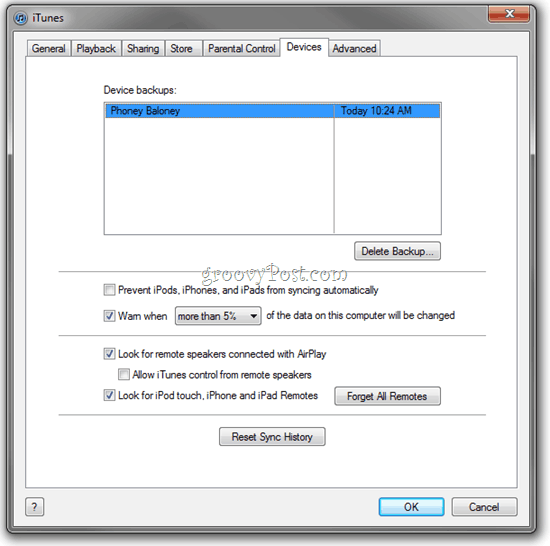
The conventional way to do this is through iTunes. Click Edit > Preferences… and Click the Devices tab. There, you’ll see a list of your backups which can be deleted with the click of a button.
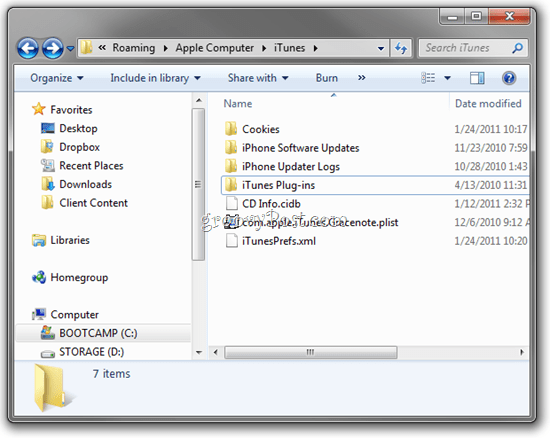
But as is often the case, this list isn’t entirely inclusive—there could be other iPhone backups lurking on your hard drive. The newer versions of iTunes are good about keeping track of these, but if you’re a longtime iPhone user, there are likely to be some strays. Use the following steps to sniff them out and eliminate them. Step 1 – Navigate to C:\Users[your user name]\AppData\Roaming\Apple Computer\iTunes.
Note: The original tipster from Reddit advises you to navigate to C:\Documents and Settings\User Name\Application Data\iTunes, but this may not work if you’re running Windows 7—you’ll just get a “Location is not available” alert that reads “C:\Documents and Settings\ is not accessible. Access is denied.” That’s because that folder is just a junction point that redirects to C:\Users[your user name]. It’s used by the system and isn’t meant for users to tinker with. Step 2 – Look for any .ipsw files. They may be in a subfolder called iPhone Software Updates or iPad Software Updates or iPod Software Updates. Essentially, any device you have running iOS may have a .ipsw file floating around. You can delete them safely.
Step 3 – Also, look for any .ipsw files in C:\Users[your user name]\AppData\Roaming\Apple Computer\MobileSync. On my computer, I had a Backup subfolder in MobileSync that was almost 500 MB and hadn’t been modified for five months. I deleted it safely.
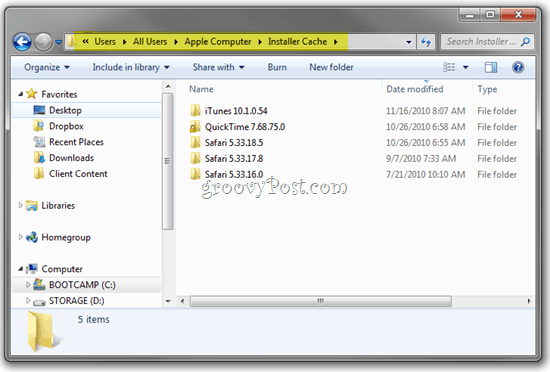
Step 4 – You can also navigate to C:\Users\All Users\Apple Computer\Installer Cache and delete whatever’s in there with impunity. For me, there wasn’t much there, but it did clear up about 30 MB.
For Mac OS X Users
You can find .ipsw files and other iTunes clutter in the ~Library/iTunes folder. Launch Finder and Click your Username on the left. Then, choose Library > iTunes.
Conclusion
You can delete these backups and temporary files without affecting your iTunes library or your iPhone, iPad or iPod Touch. But remember: you are deleting backups here. Only do this if you’re sure you don’t need them anymore. I recommend backing up your iPhone or iPad right after completing the above steps. That way, you’ll know which backup is a keeper (and it’ll show up in the iTunes preferences pane). To the dude that commented about the spelling, uhh… get a life, I guess! It’s a great tool, super simple to use and I can vouch that it’s safe and simple to use. btw – welcome to the blog! ;) Amazing. Comment Name * Email *
Δ Save my name and email and send me emails as new comments are made to this post.


![]()
