Change Windows 11 Account Picture
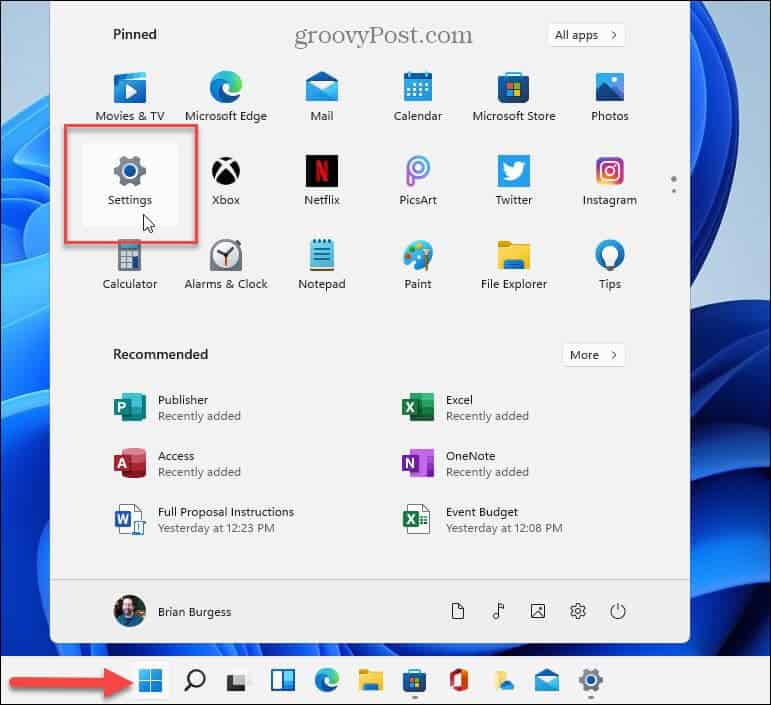
Note: You need to have an Administrator or Standard account to change a photo. Also, the steps for changing an account image are the same for local, and Microsoft accounts via Settings. To begin, click on the Start button and then click Settings. Alternately, you can use the keyboard shortcut Windows key + I to open the Settings app directly.
Next, click on the Accounts option from the list on the left.
On the following screen, under the “Accounts” section, click on Your Info.
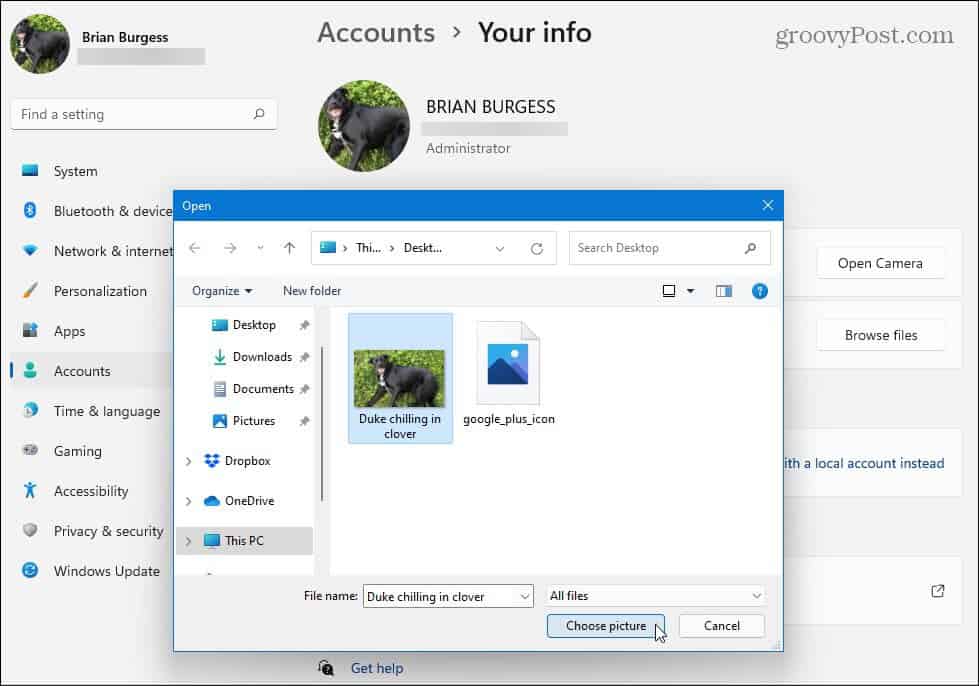
You have two options to add a new photo under the “Adjust Your Photo” section. You can click the Open Camera button to use your webcam to take a shot. Or you can click the Browse Files button and navigate to the location of the photo you want to use.
In the example below, I am browsing to a location of a photo of my dog that I want to switch the account picture too. Whatever photo you want to use, browse to it, highlight it, and click the Choose Picture button.
Your account photo will be changed right away, and you can enjoy the new look of your sign-in experience.
Change Your Windows 11 Account Photo Online
To change your account photo online, head to the Microsoft Account Profile page and log in if you aren’t already. Under the “Your Info” section, click the Change Photo button.
Next, click the “Add a Photo” link.
Navigate to the image you want to use and adjust it on the screen. When you are finished, click the Save button.
That’s all there is to it. Your new account photo will sync across Windows 11 devices you use your Microsoft account to sign in. For more on the new OS from Microsoft, check out our article on moving the Start menu to the left. Or take a look at using the improved Virtual Desktops feature on Windows 11. Comment Name * Email *
Δ Save my name and email and send me emails as new comments are made to this post.
![]()


